December 2016 – Winter Party
[gallery size="medium" best casino canada ids="6654,6655,6656,6684,6657,6658,6659,6661,6662,6663,6660,6664,6665,6666,6667,6668,6669,6670,6671,6672,6673,6674,6675,6676,6685,6677,6678,6679,6680,6682,6683,6686"]
Meeting Information: Saturday, September 24th, from 9 am to 4 p.m.
J Paul Fennell: Turning and Surface decorating
Special all day demo: $25 fee includes lunch
At Levi Mize Woodcraftsman’s Shop
162 Aviador Street #17+18, Camarillo, CA 93010
Aviador Street is N. of the Camarillo Airport and is reached from the Central Ave. exit off of US 101: go S. and turn left on Ventura Blvd. then right on Aviador St. About three-quarters of the way to the dead end, on the left is a long building. Levi’s shop is the last two doors on the left on the S. side of the building. Please park directly in front of or behind his shop or against the curb on the N. side of the building and not in front of other shops.
BRING YOUR OWN CHAIR OR SIT ON THE FLOOR
August was again a very busy month with the Ventura County Fair 2005 (more photos have been added of booth activities), and the excellent meeting on August 28th featuring our past president Jim Rinde giving a demonstration of use of the boring bar for deep hollowing of vessels. Photos from the meeting and Jim’s presentation are below.
The school mentoring program at Cabrillo Middle School started Sept. 1st and is in full swing right now. If you have time to contribute contact President Al Geller and sign up. The kids are a pleasure to work with and eager learners.
The meeting this month, Sept. 24th features J. Paul Fennell. We can only accommodate 35 people so be sure to reserve your spot by calling or emailing Al Geller. The fee of $25 covers our costs and includes lunch. The following are several links to sites that feature Paul’s work and will give you a short biography and indication of what he will be presenting: del Mano Gallery – Bio -J. Paul Fennell, del Mano Gallery |photos| J. Paul Fennell. J. Paul Fennell is a wood-turner whose interest in creating original objects from the lathe dates back to the early 1970s. His thin-walled hollow forms are turned from woods of unusual colors, figures and grain patterns, mainly from native American species, but sometimes from imported woods as well. The vessel forms are derived from variations of simple but pleasing classical shapes ubiquitous throughout civilization. To enhance the work, experiments are continually made to explore variations in surface texture, bleaching, gilding and carving.
Photos from the September meeting:
Photos from Jim Rinde’s presentation on the use of the boring bar:
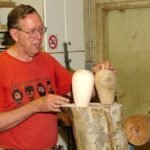
Jim with two hollow forms he turned last week as examples from a log like the one they are sitting on. End grain.

One of the first deep vessels Jim turned using his boring system which orignally didn’t have a laser light but used and internal light to judge wall thickness
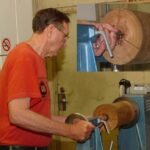
The initial hollowing is done with a forstner bit to the chosen depth. Inset show the frequent need to clean out the shavings

Using a level the boring bar is set with the cutting edge at center point and the tool level on the tool rest and the secondary back capture rest. The wires on the end are for the internal light system that Jim used prior to laser systems being developed
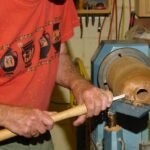
After the intial hollowing to the top part the outside is shaped before the remaining bulk is hollowed- this adds stability at this stage. Each part is finished before additional hollowing is done.
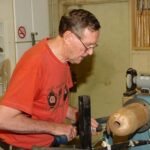
Power sanding the top portion that has been dried. Normally he would sand to the final grit at this stage before proceeding to hollow deeper
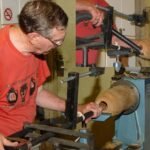
Hollowing out the next section as he proceeds deeper into the form. The inset shows use of a shop vacuum to remove savings